Manfotto Befree 3 Way Live Advanced Tripod Guide
Guide to Using the Manfrotto Befree 3-Way Live Advanced Tripod
The Manfrotto Befree 3-Way Live Advanced Tripod is designed for high-precision framing and smooth video panning. This operational guide provides step-by-step instructions on adjusting the core mechanical features safely and efficiently.
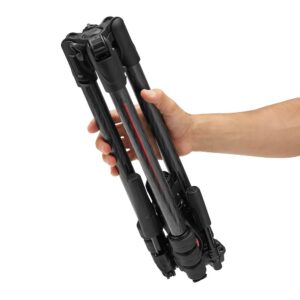
1. Deploying and Adjusting the Tripod Legs
The tripod utilizes an ergonomic layout engineered for rapid deployment on varying terrain.
- Opening the Legs: Swing each leg outward from the center chassis. Use the side-push leg angle selectors near the top casting to click individual legs into one of three preset angles (22, 54, or 89 degrees) for standard, medium, or low-ground shooting.
- Extending Leg Sections: Flip open the high-performance QPL Travel Levers (quick power locks) on a leg segment. Slide the aluminum leg extension out to your desired height, then snap the lever firmly shut to lock the section securely.
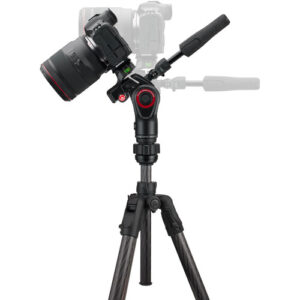
2. Operating the 3-Way Fluid Head Control Handles
The fluid head features fully collapsible, ergonomic handles that regulate pan, tilt, and level orientation.
- Unfolding the Handles: Rotate the control handles outward into their extended, functional positions before shooting.
- Adjusting Friction and Movement: Turn a handle counter-clockwise to loosen its respective axis. The long handles feature integrated high-performance fluid drag cartridges to ensure completely smooth, judder-free panning and tilting. Twist the handles clockwise to lock down your final camera angle.
3. Mounting the Camera with the 200PL-PRO Plate
The tripod head includes a dual-compatibility safety receiver mount.
- Attaching the Plate: Secure the included 200PL-PRO quick-release plate to the bottom of your camera body using the integrated D-ring or a standard slot screwdriver.
- Locking Into the Head: Push the secondary gold safety lock lever on the side of the tripod head chassis, pull back the main quick-release lever, and drop the camera plate directly into the top platform. Press down until the spring-loaded lock clicks shut.
Summary of Component Functions
| Component Feature | Primary Use / Physical Control Mechanism |
|---|---|
| QPL Travel Levers | Flip levers open to adjust leg segment extension; snap shut to lock structural height. |
| Collapsible Handles | Twist counter-clockwise to allow fluid pan/tilt movement; twist clockwise to completely lock framing positions. |
| Leg Angle Selectors | Side-push buttons that let legs lock into three independent angles for uneven surfaces. |
| Safety Release Lever | Requires a deliberate dual-finger toggle to release the quick-release plate, preventing accidental camera drops. |